AI Image Translator: An English-to-Japanese Poster Example
Follow a real English-to-Japanese image translation with Doc2Lang Pro. Compare the poster, explore the settings, and download an image or copy its translated text.
An image translator is useful when the words you need are embedded in a graphic rather than an editable document. But what does the result actually look like? This example takes an English poster through Doc2Lang Pro and shows the Japanese image produced by the service, alongside the original.
The poster combines large headings, explanatory paragraphs, icons, a three-column table and a numbered workflow. That makes it a useful example for anyone who wants to translate text in an image while keeping the information in its visual context.
The original poster and its Japanese translation
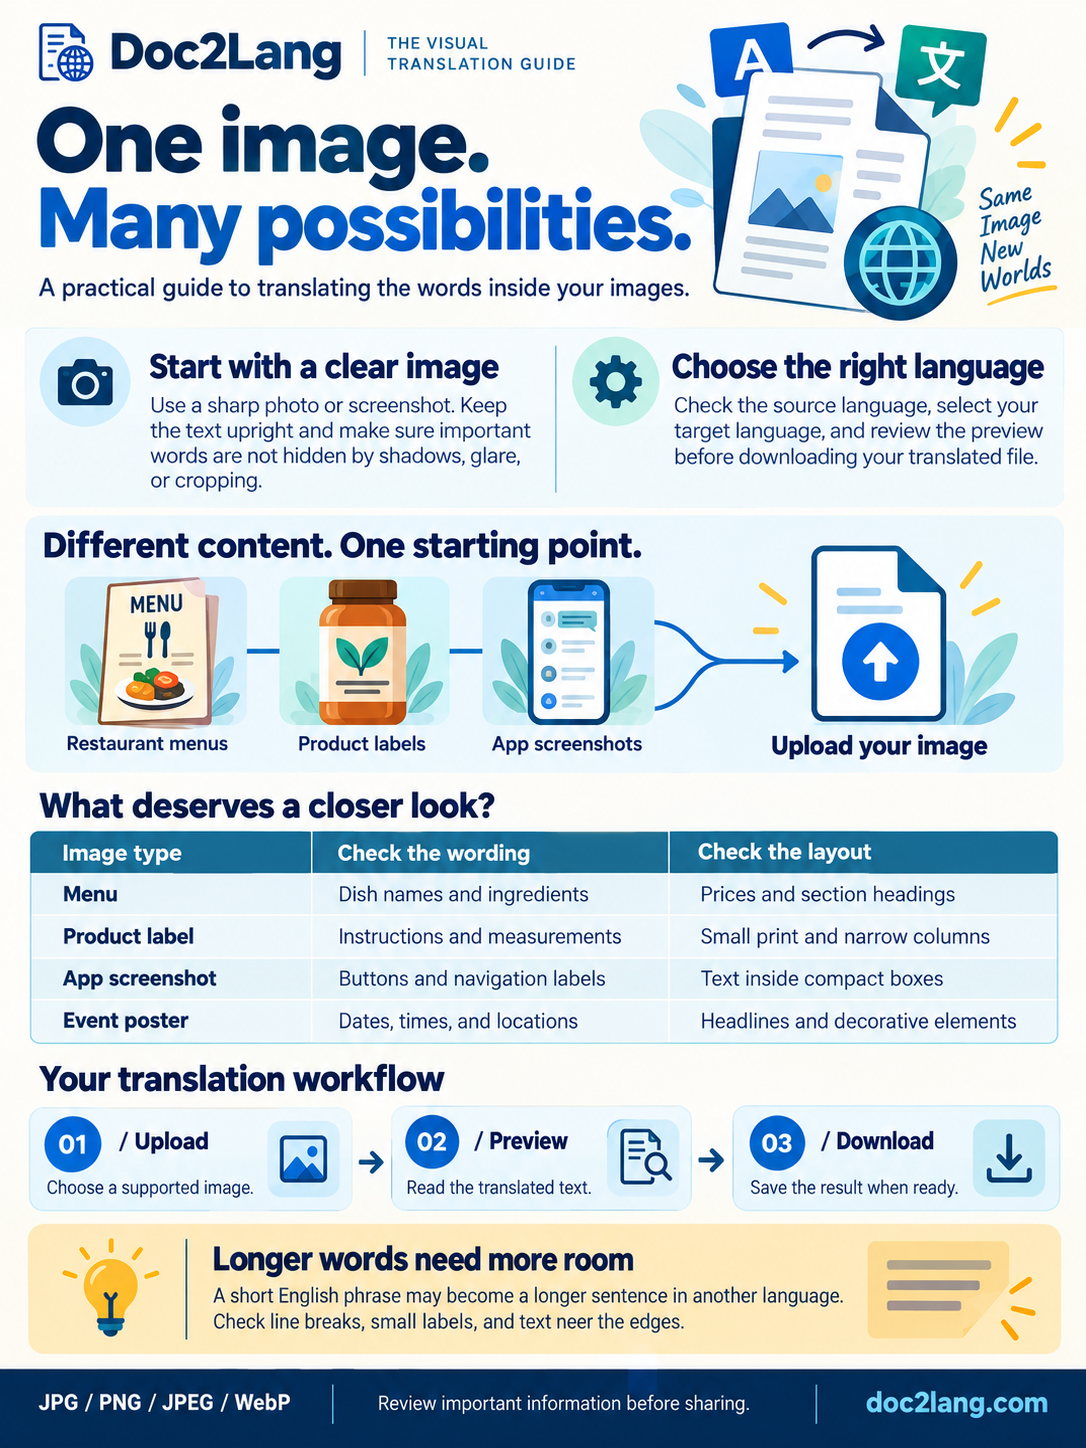
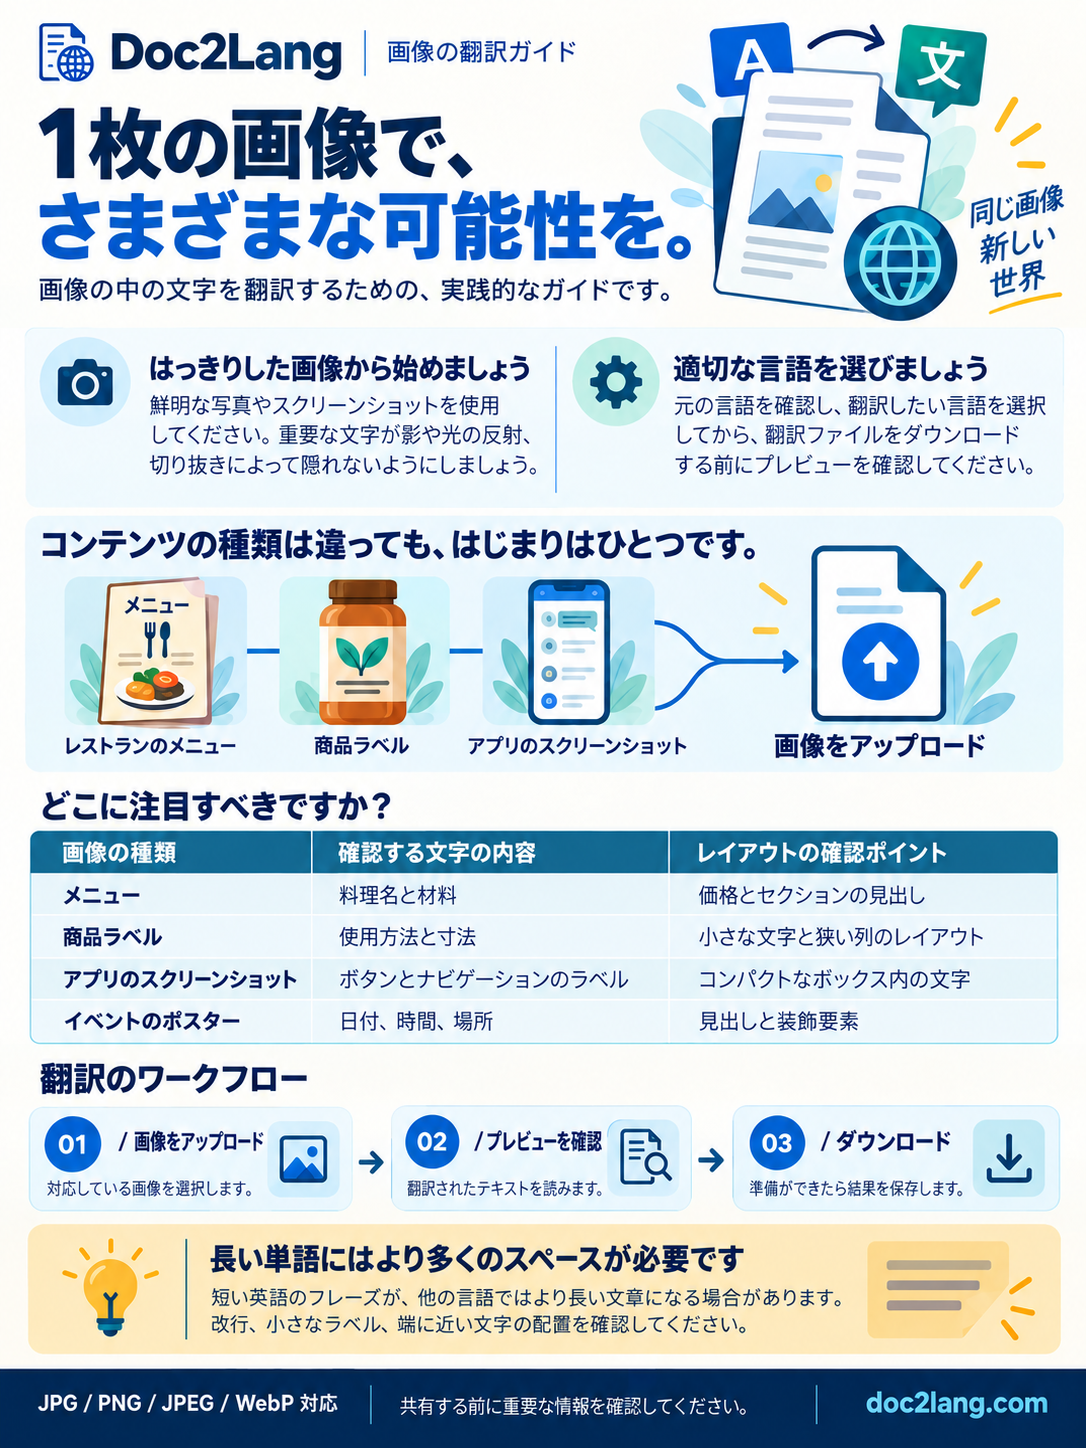
Select either image to view the full-size poster.
Both images follow the same visual sequence: an introduction at the top, two advice panels, illustrated content types, a checklist table and three translation steps. The camera, gear, menu, product label and phone illustrations give readers reference points as they move between the versions.
In this example, the menu and product label are illustrations inside the poster. The file translated for this walkthrough is the complete poster; separate restaurant menus, packaging and app screenshots are possible projects to approach with the same preparation steps.
How to translate an English image into Japanese
1. Upload the original image
Open the image translation page and select your file. Doc2Lang accepts JPG, JPEG, PNG and WebP images. Use the original export when you have it, especially if the graphic contains small type. For this example, we uploaded the English poster as a PNG.
2. Choose the language direction and Pro mode
Set the source language to English and the target language to Japanese. Select Pro and the General style to follow the settings used here. The screenshot below shows the upload settings in the English interface: English → Japanese, Pro mode and General style.
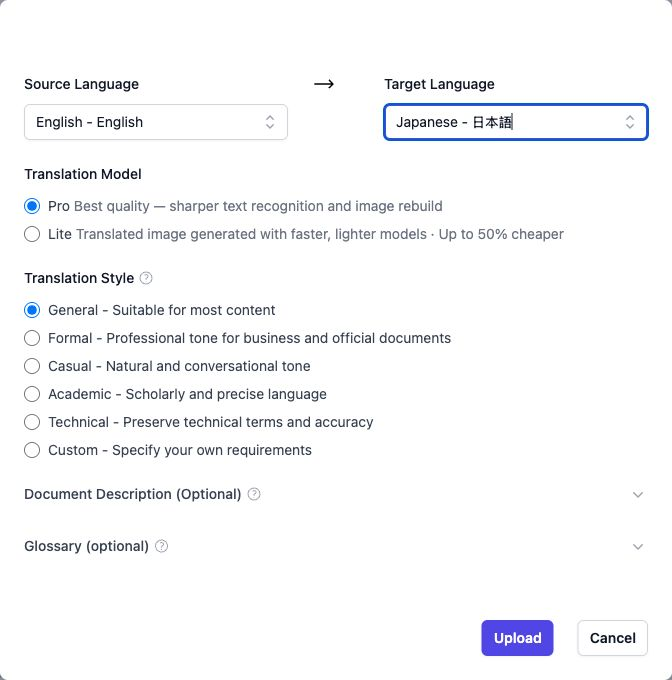
3. Review the preview and displayed cost
Continue to the preview and check that you have selected the intended file and language direction. Before starting the complete translated image, review the cost displayed for your task and confirm the full translation. A preview and a completed translated image are different stages of the process; this article shows the completed Pro output.
4. Open the completed result
Compare the original and translated images, then zoom in on the parts readers will rely on. On this poster, that means the table headings, the labels below the illustrations and the instructions in the two upper panels. Follow each table row across its columns so the relationship between the text and its visual position is clear.
5. Download the image or copy the text
Download the translated image for your presentation, reference material or next editing step. The result page also provides translated text that you can copy separately. Use the image when the layout matters; use the text when you want to quote a passage, search a phrase or work on wording in another document.
Prepare an image that is easy to read
Small text needs enough pixels to remain legible when enlarged. Avoid repeatedly compressing the same image, and prefer a clean export over a screenshot of an already reduced preview. Keep the text upright and leave room around the edges so captions and footnotes are not cut off.
If you photograph a printed page, use even lighting and avoid glare across the words. For a screenshot, remove unrelated interface elements while retaining the headings that explain the content. These choices help make both the source and the finished comparison easier to inspect.
Japanese also occupies space differently from English. Look at complete text blocks, not just individual words: line breaks, heading size and the relationship between a label and its icon all affect how a reader follows the poster.
Frequently asked questions
Can an AI image translator return an image rather than plain text?
This Pro example produced a translated Japanese image. The result also includes a separate text version, so you can choose the output that suits your next step.
Which image formats can I upload?
JPG, JPEG, PNG and WebP are supported. For graphics with small labels or tables, choose the clearest original file available.
Can I use this workflow for a different target language?
Choose the language you need in the translation settings. The comparison above documents English to Japanese specifically; check your own completed image in the chosen language before sharing it.
Where do I see the price for the full translation?
Review the amount displayed for your task before confirming the complete translation. This walkthrough does not assume a fixed price for every image.
Ready to work with your own graphic? Translate an image with Doc2Lang, choose your language direction and use the preview to check the task before continuing.